
It’s Tuesday morning now and I’m finally back again with the long-overdue entry for Sunday. This is an odd assortment of images, and most of them have not even been taken on Sunday at all. The reason is …
I have a new tool. It’s Pixel Vistas PhotoLift, a Photoshop filter costing 40 US dollars. I found it by chance, browsing ads on The Online Photographer. PhotoLift is a tool to manipulate local contrast in an image. Using Photoshop’s “Unsharp Mask” filter with a high radius and a low amount (termed HIRALOAM by Dan Margulis, see also here) can be used to achieve a similar effect, but with much less direct control and not with the same accuracy as PhotoLift. PhotoLift is available on Windows for Photoshop up from CS, and on the Mac for CS3 on Intel processors only. Let’s begin with this image of a house in a small village in Carinthia. It is about the balance of two windows, a piece of roof and a piece of ground, but it is also about texture. In this first image I have used a layer created with PhotoLift, set it to blending mode “Multiply” and a reduced opacity of 50%, this way burning the texture into the wall. The original was not overexposed, but the wall was very light, thus the mode “Multiply”.
 The user interface of PhotoLift is rather simple and lacks finesse. You can set the strength of the effect with a “Local Contrast” slider and the type of effect with a drop-down “Texture”. Texture can be set between “Coarse” and “Very Fine”, basically determining the “locality” of the effect.
Applying this effect can clip highlights and/or shadows, therefore you have the usual red and blue clipping indicators. They can be switched on/off with two buttons at the bottom, but you really want them on. If you see clipping, you can decrease global contrast with the “Global Contrast” slider, and in case the clipping is only on one side (highlight or shadow), you can shift brightness, to bring the image back into the middle of the tonal range.
The effect can be applied with two “Tools”, a paint bucket that fills the whole image, and a brush that you can use to paint the effect into the image. There is an eraser as well, and finally you can set an opacity for the effect.
In practice I found the brush much too slow. I always use the paint bucket, and instead of applying the effect partially inside of the plugin, I use a Photoshop mask on the resulting layer. That’s much easier. Here we can see the dramatic difference between the image with and without the effect. It’s striking.
There are two more issues with the plugin, the first being only a slight annoyance: It lacks a “Reset” button but it remembers values between invocations. I hate that. This effect has to be set individually for each image, and without a “Reset” button, I have to manually reset everything upon startup.
The other issue is due to the interactive nature of the plugin, i.e. due to the ability to use a brush and an eraser, and that are more or less unusable anyway. As it is, this plugin can’t be a parametric filter, and therefore it can’t be used as “Smart Filter”, and in actions it will always pop up. This is an unfortunate design decision that I would strongly suggest to reconsider. I would drop the concept of “Tools” at all, make the filter parametric and of course add a “Reset” button 🙂
Now the question is: is this filter for you? When would you apply it and for what types of images? Let’s look at some examples. The first one is rather obvious again. This is the promised image of the way that I went up the mountain Dobratsch late afternoon on Saturday. I was on the shadow side of the mountain, the tonal range goes from very light sky near the horizon over dark sky in the zenith to almost black patches of ground coming through the snow.
 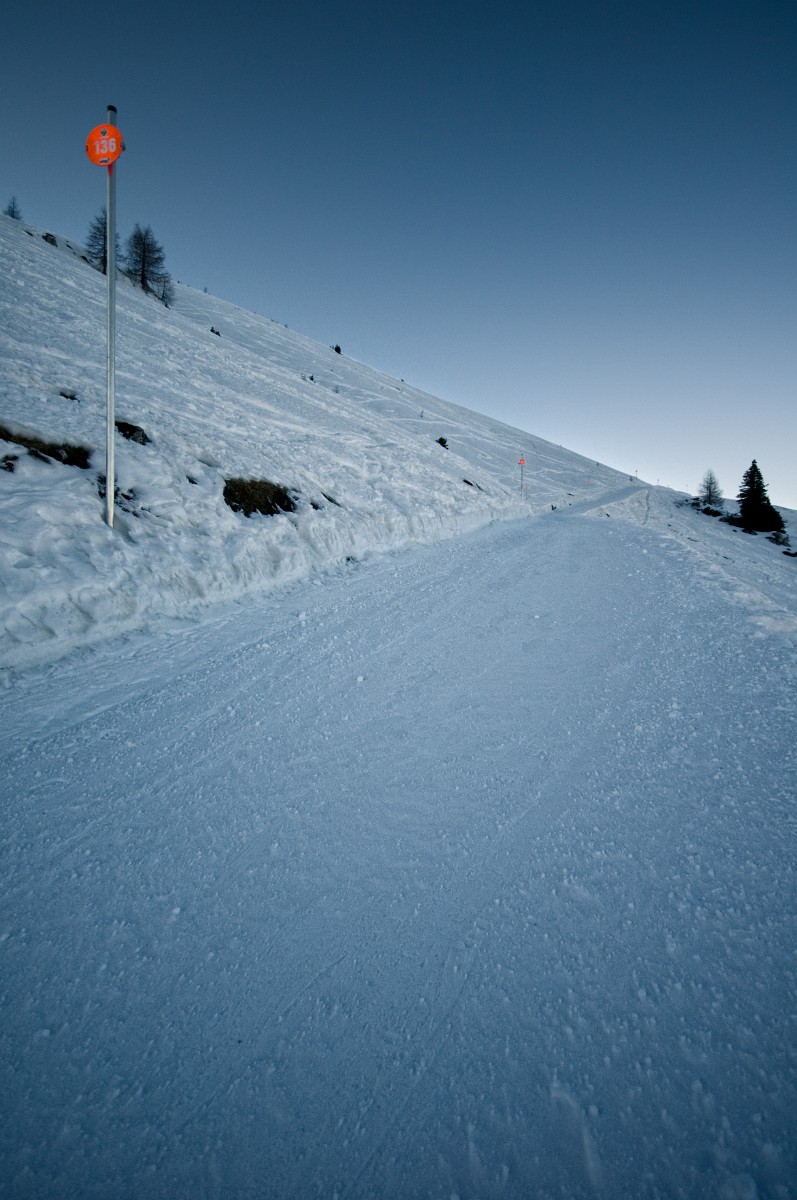 In the final image, reduced to 8 bits, there is not much tonal range left for the texture in the snow. It looks flat.
And now the same image, but with PhotoLift applied to the snow area. What a difference again! Suddenly we can see texture.
I have not tried to apply this effect to 8 bit images and, frankly, I wouldn’t, because although there is enough tonal reserve in the RAW file, that is hardly true for a JPEG. On the other hand, I always shoot RAW+JPEG and never manipulate JPEGs at all, so that’s not a problem. I leave you with three more subtle applications of the effect. This image of a farm house in our village in Carinthia was flat in the concrete areas to the left. I have partially applied the effect to those areas, in “Normal” blending mode and with decreased opacity. That’s a pattern in general: I tend to make the effect rather strong, and then reduce opacity. This often leads to more control, and I can always revise my decisions later.
 This image of a damaged mural on a church in Carinthia had the effect applied to the damaged areas only. I would do that to put emphasis on the fact that it’s damaged.
 The final image is a B&W image of a bridge, and here I have subtly increased local contrast on the underside, making the concrete texture and the shimmering light from the reflections of the water more tangible.
And what about the Image of the Day? The only image beside the mural, that was actually shot on Sunday? It has the
effect as well. Here I have used it in “Screen” mode with reduced opacity on the wall of the church. It brightens the main subject and at the same time makes it rough. This image is of course an HDR image made from multiple exposures, tone mapped in Photomatix Pro and brought to life in Photoshop.
The Image of the Day and the way up the mountain were shot with the Sigma 10-20 at 10mm, all others with the Sigma 70/2.8 Macro, as usual on my Nikon D300.
The Song of the Day is the Gershwin standard “Treat Me Rough”, interpreted by Ella Fitzgerald. If you don’t have them, why not get all of the “Song Books”?
There are 5 comments
Thomas (2008-02-23)
Thanks! That certainly sounds like a useful tool. I'll certainly give it a try.
Ted Byrne (2008-02-25)
So this allows you a selective sharpening? Or the impression of it? Hmmmm.... The snow scenes failed to work well on my monitor, but the rest seems useful. What happens when you apply it to a portrait?
Anonymous (2008-03-07)
What a ripoff...How is this filter different from using unsharp mask with selection and levels/curves adjustment layers? What a waste of money.
Anonymous (2008-02-20)
That filter looks fantastic. It would be nice if you had a way to compare the before and after shots side by side.
💬 Reply 💬